How to Build a Budget Racecar
In July of ‘21, I decided I would get into racing.
The Video
I’ve since posted a YouTube video about this build. If you’d rather watch than read, check it out here:
I put this post together to prove that it’s possible to build a track-ready race car on a reasonable budget.
As a matter of politeness, I won’t share exact numbers. A “reasonable” budget is unique to everyone—you can figure out yours on your own.

On track at Driveway Austin.
Want to skip to the build?
The Background
I hadn’t been a racing fan for very long. Around ‘18 or ‘19, my family began watching Formula 1: Drive to Survive on Netflix and started casually following the seasons. I followed tangentially, but my interest didn’t really peak until the pandemic. At that point—in desperate need of a hobby—I built a sim rig, started following F1 more closely, and eventually joined a karting league at Circuit of the Americas.
My GoPro footage of the 2021 COTA Karting Summer League.
I met some folks in the league who had done track days at COTA and elsewhere, and after one season, I was convinced I needed to get into that world myself.
I had to start with a car. I set a strict budget and began the search.
The Car
My criteria was simple:
- Inexpensive to purchase and maintain.
- Rear-wheel drive.
- Reliable.
- Cheap consumables (tires, brake pads, etc).
- Manual, or at least an automatic with paddle shifters.
The answer was a roadster—specifically the very cheapest of them all: the “hated”* 3rd generation (NC) Miata.
*Why hated? It’s often called “the boat” because it’s slightly heavier and body-rolls. But that hatred makes it the most affordable entry point.
Near the end of the month, I found it: a 2006 Mazda MX-5 Miata in Bryan, Texas. The previous owner had bought it for his daughter, but she didn’t want it**, so it sat in a garage while the soft top became a resting place for the family cat.
**I didn’t ask why.
The car was in great mechanical condition with only 37,000 miles on the odometer—a leisurely weekend roadster. It was an automatic with paddle shifters. The exterior was a bit beat up: a large dent ran down the passenger door, the headlights were opaque yellow, the horn was dead, and the side mirrors didn’t match. I learned it had a rebuilt-salvage title; the car had been totaled in a spin leaving a dealership in Las Vegas. The body took the hit, but structurally the car was sound.
After a few weeks of negotiation, I picked it up on August 1st.
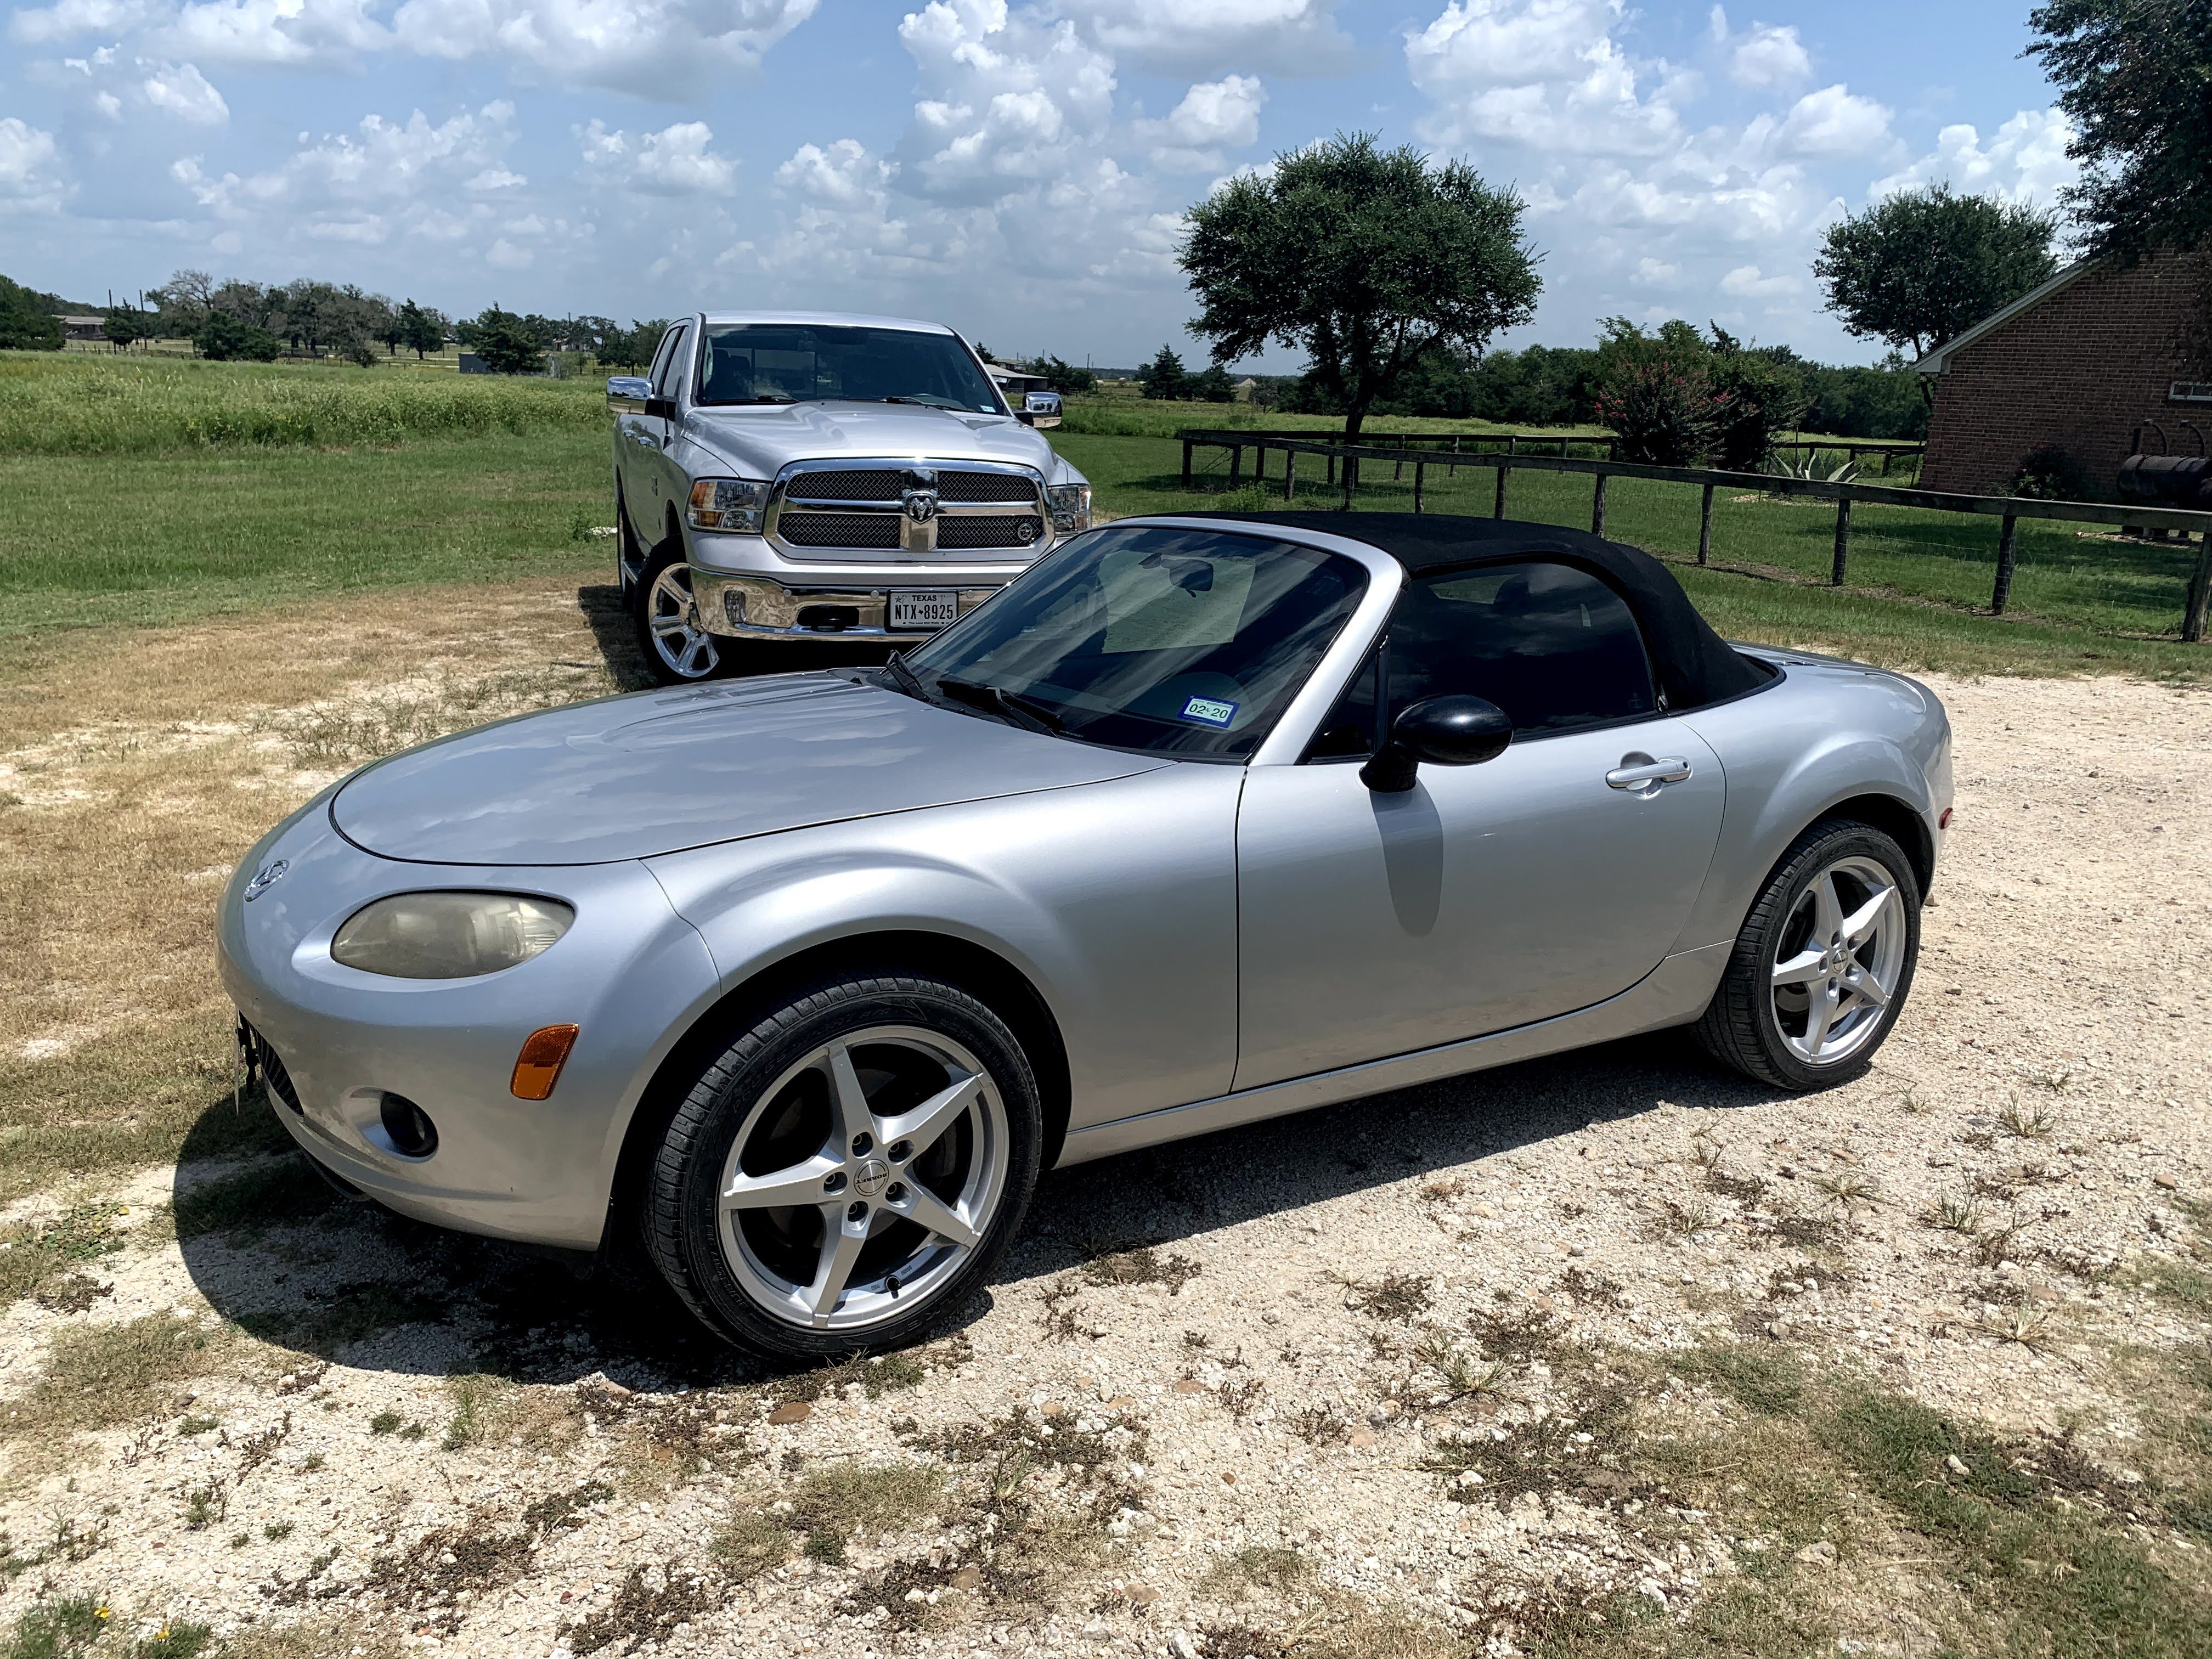
The Miata on pickup day.
The Clean Up
Since I didn’t have a full maintenance history, I started by bringing the car up to a baseline:
- Changed the oil and filter.
- Had the dent repaired by a local PDR (Paintless Dent Repair) service.
- Replaced the engine air filter with a K&N filter.
- Replaced the coolant expansion tank; the stock plastic tanks degrade and tend to fail after 10 years.
- Replaced the missing Mazda badge and Miata badge. I know they aren’t period-correct; I just think these look cooler.
- Professionally detailed the car and restored the headlights.
- Added a dash cam and floor mats.
- Replaced the unmatched mirror and the horn.
- Fixed the paint chips with a scratch repair kit.
FYI: If you buy something through an Amazon link, I may earn a commission.
The First Run
With the car at a stable baseline, I enrolled in Foundations of Road Racing at the (now closed) Driveway Austin.
I learned two things quickly: I loved being on track, and the car had major limitations. The body roll was comical and the all-season tires had zero grip. It was time to move beyond maintenance and into engineering.
The Build
I grouped the upgrades here for simplicity:
- Differential: Drained and replaced with Red Line 75W90 Synthetic Gear Oil.
- Brakes: Upgraded to DOT4 fluid to raise the boiling point. On-track braking is violently hard on fluid; DOT3 will boil and leave you with a useless pedal. I swapped the stock lines for Power Stop stainless steel hoses and refilled with Red Line RL-600. I also installed Hawk Performance HPS pads.
- Safety: Installed a Hard Dog M3 Sport double-diagonal roll bar. Most tracks require an SCCA-certified bar for convertibles.
- Handling: To kill the body roll, I installed a Whiteline Sway Bar Kit. I kept the stock springs and shocks; the bars alone did the heavy lifting.
- Grip: Mounted Falken Azenis RT615K+ tires—extremely grippy 200-treadwear summer rubber.
The Re-Run
I took the updated build to Advanced Road Racing at Driveway Austin. I was in one of the last classes before the land was sold to the city. Here’s a lap around the Grand Prix configuration:
A lap around the L3 configuration at Driveway Austin.
The car handled superbly. The body roll was gone, the brakes didn’t fade over a full day of abuse, and the tires allowed for much higher mid-corner speeds. Plus, I felt much better about my odds if things went shiny-side down.
The Process
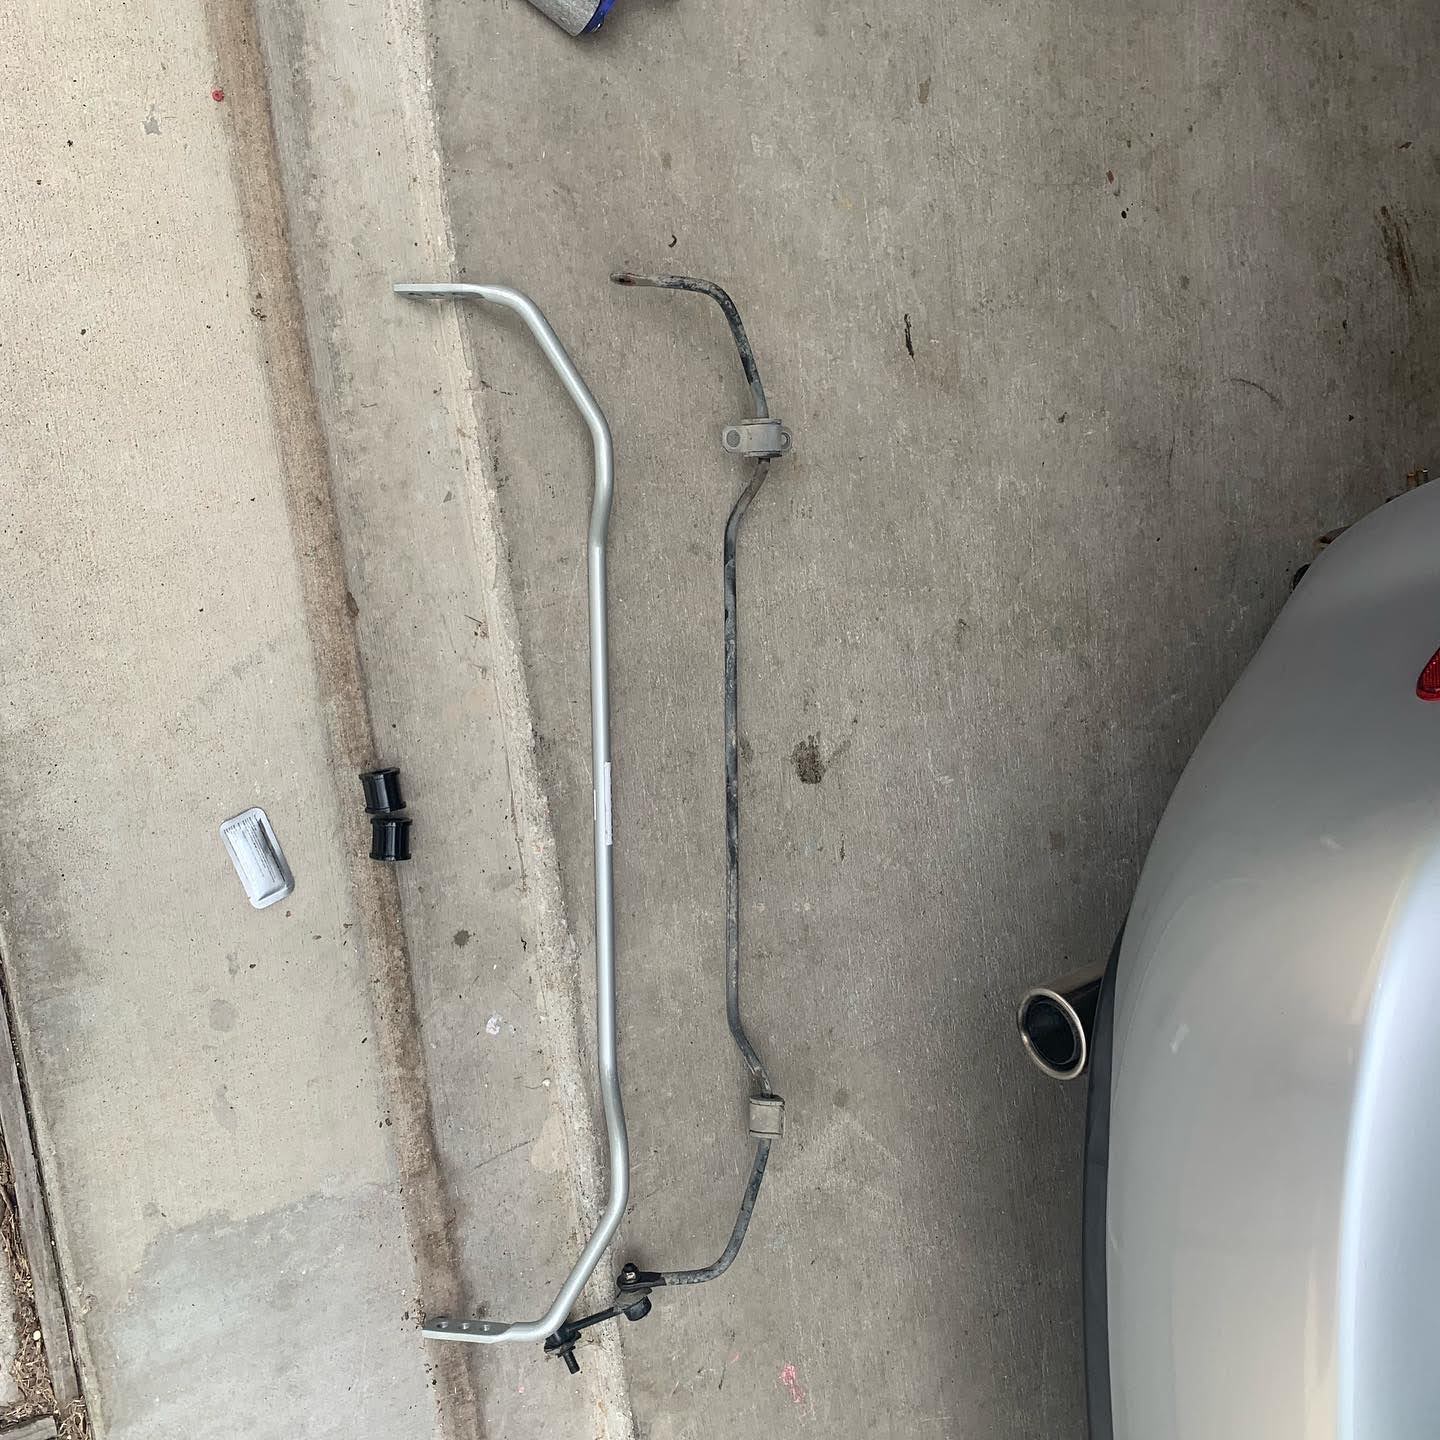
Thickness difference between the new and old sway bar.
Riley double-checking the brake work.
The Next Steps
This year, I’m competing in regional autocross and heading back to COTA.
The Miata is slow on the straights, sure, but racing happens in the turns. It’s cheap to run, easy to drive, and proof that you don’t need a Porsche budget to have a fast car.
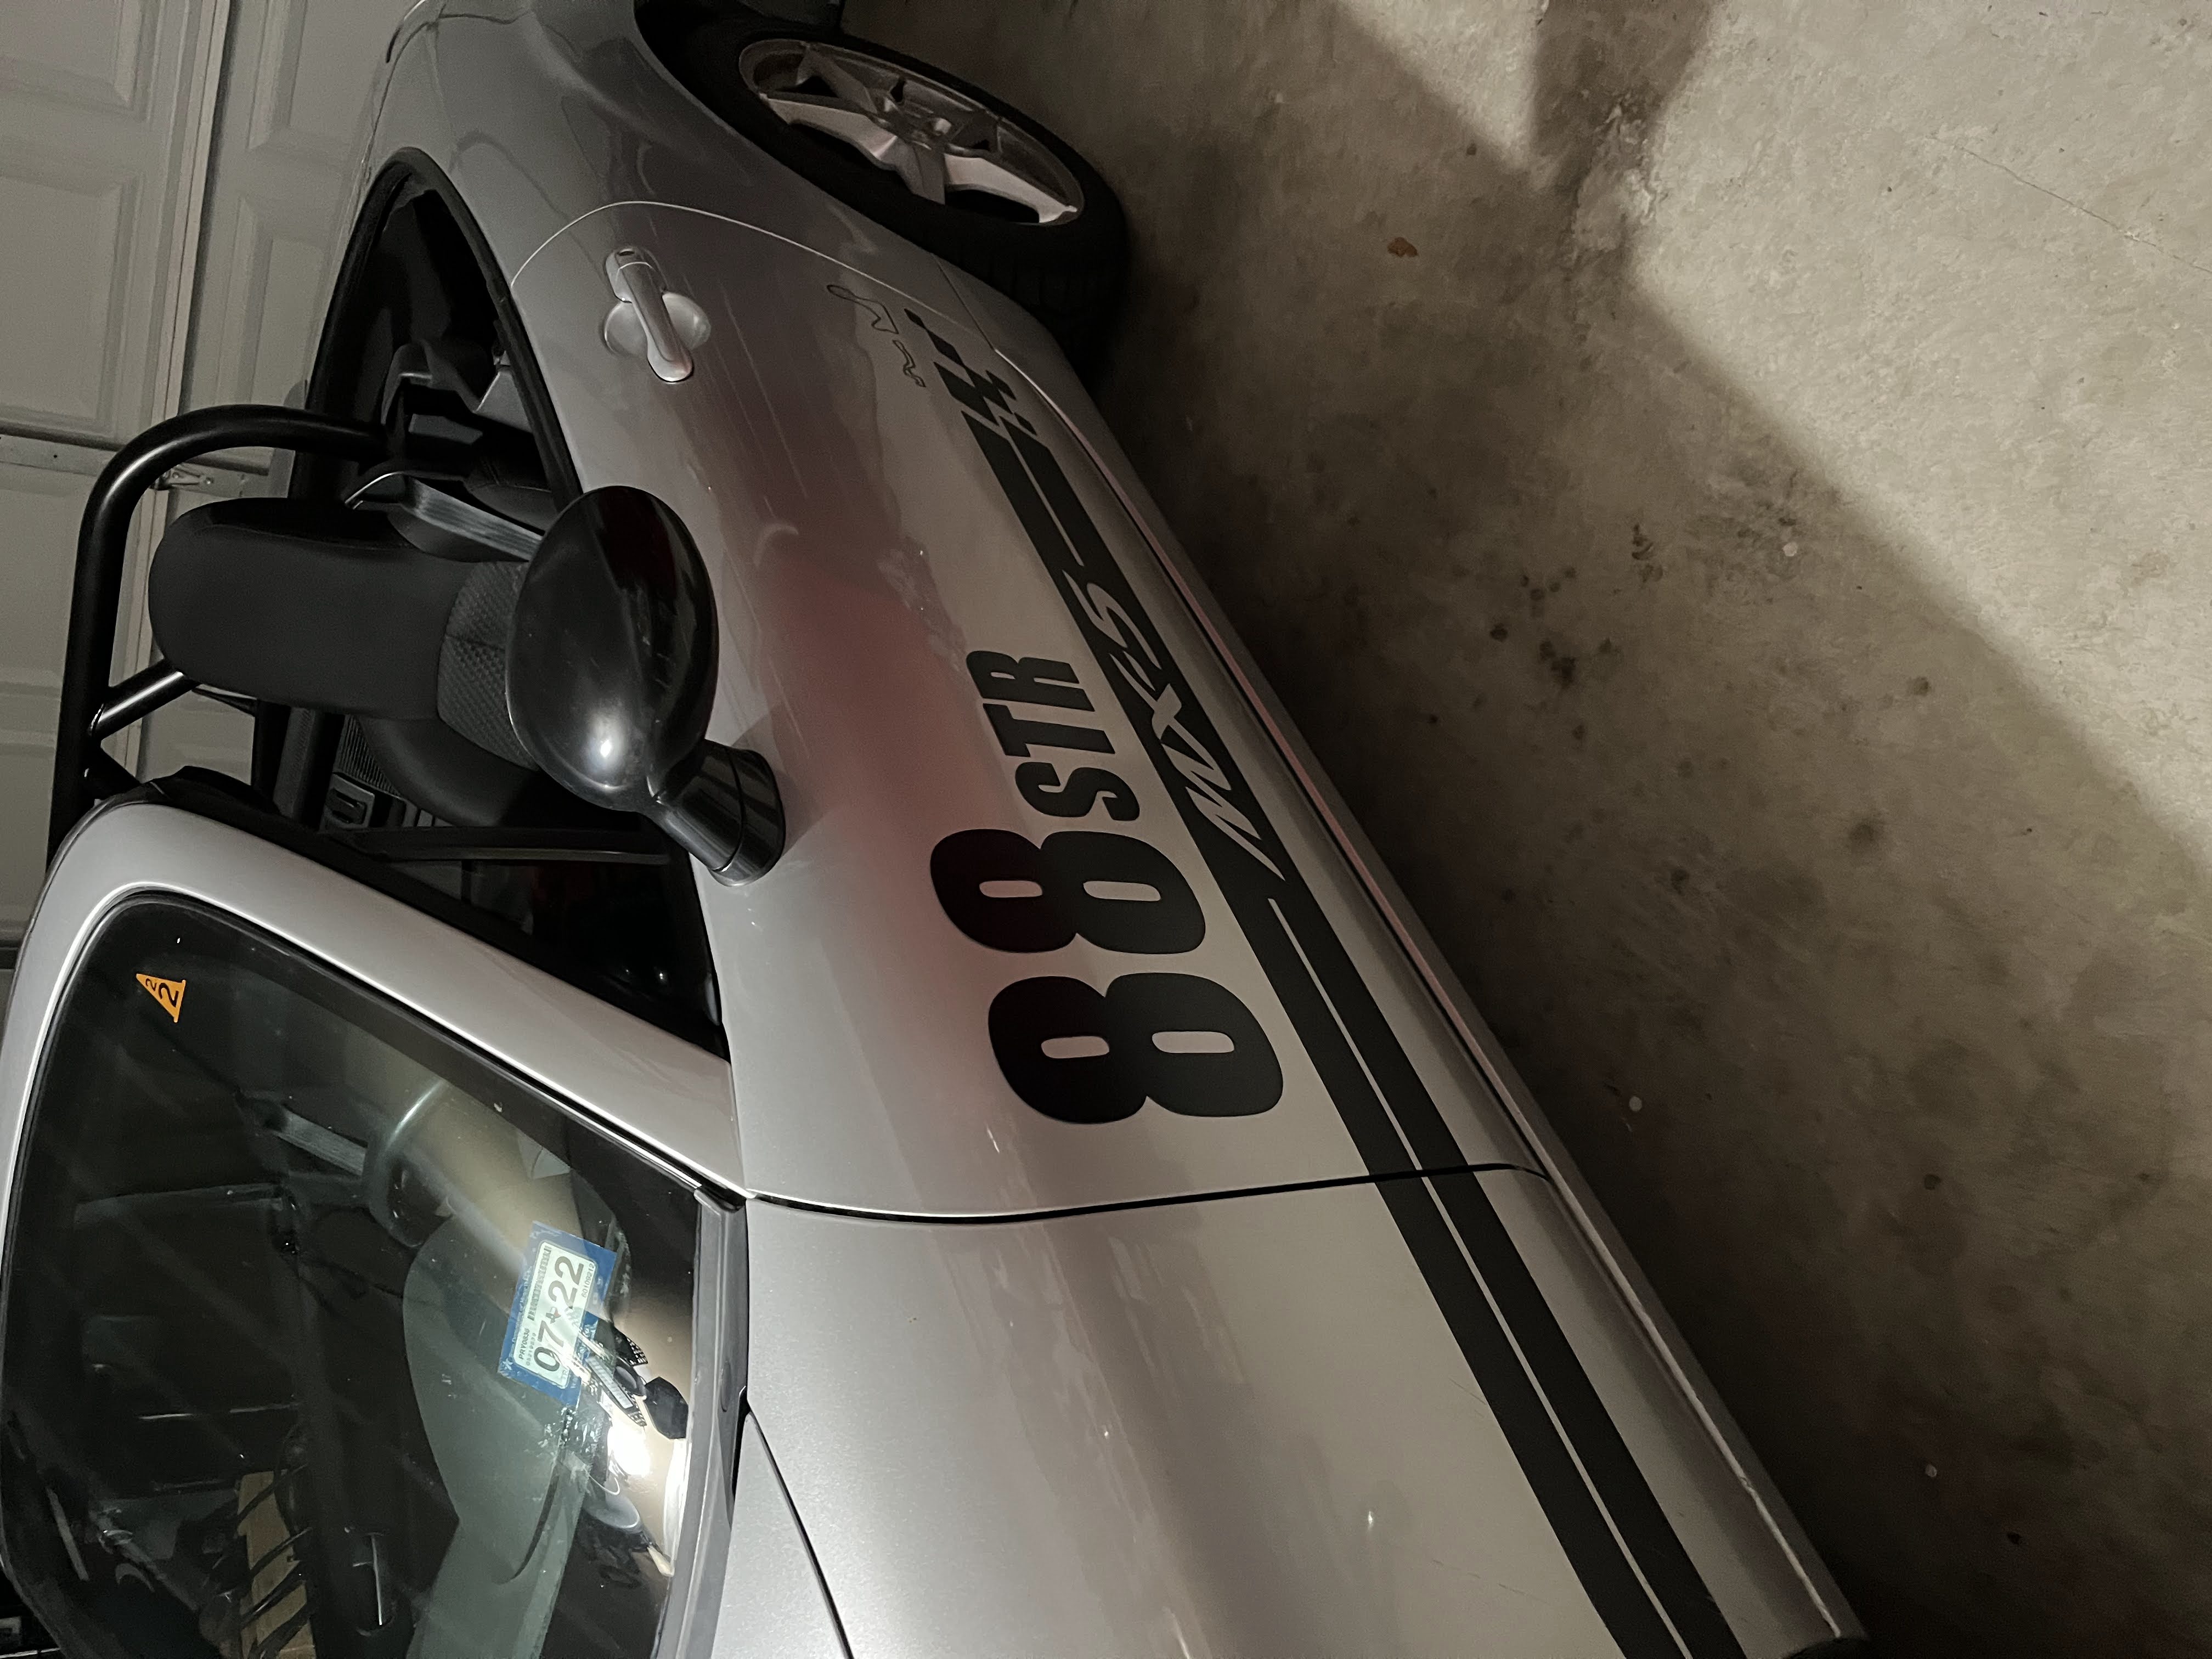
Number 88.